Sitting Duck: A Woodworking Do-It-Yourself Dish Towel Rack or Windowsill Curtain Hold-back
EducationSitting Duck: A Woodworking Do-It-Yourself Dish Towel Rack or Windowsill Curtain Hold-back

Woodworking Gift Idea: Kitchen Towel Rack
.jpg) (image and creation by author)
(image and creation by author)
This is a very easy to make do-it-yourself woodworking project.
It is a towel rack for small kitchen hand towels. Used either singly or make two as a matched set and attach to either side of a curtained window as curtain hold-back devices. The curtains can be drawn back and threaded between the legs of the duck on either side for a charming country cottage ambiance.
Some Basic Woodworking Tools Needed:
- Tools required will be an electric jig saw; electric drill and a half-inch drill bit; various grades of sandpaper, and two colors spray paint.
- Materials for this project: you will need a wooden board that is one-inch thick and the length/width dimensions can vary but let's assume 18-inches long by 10-inches wide.
Also needed will be two wooden dowel rods 5-inches long by 1/2 inch diameter. You will need at least two colors of spray paint, one color for the body (or, the body can be left in natural wood,) and another color for the feet/legs.
A lite stain wash could also be used for these colors to allow the wood grain to show through.
For paint, I recommend bone white or a light yellow for the body, and either dark orange or forest green spray paint for for feet of the duck. Your colors (if any) can of course vary according to whatever you wish.
Wooden Board, 18-in. X 10-in. X 1.0-in.
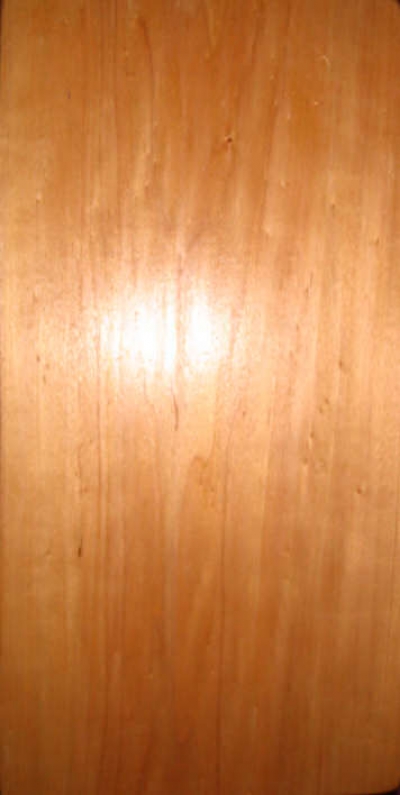
(image by author)
Above is a representative example of the board we will use. Trace the width of the board onto your sketch paper and on this paper, create your design to fill the dimensions of the paper. Transfer this design onto your board and trace it onto the wood with pencil.
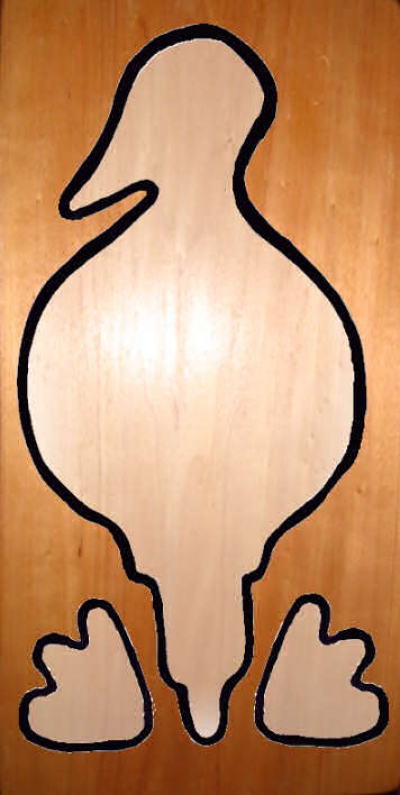
Trace Your Design, Drill Legs Holes, then Cut Out the Three Major Pieces
 and
and 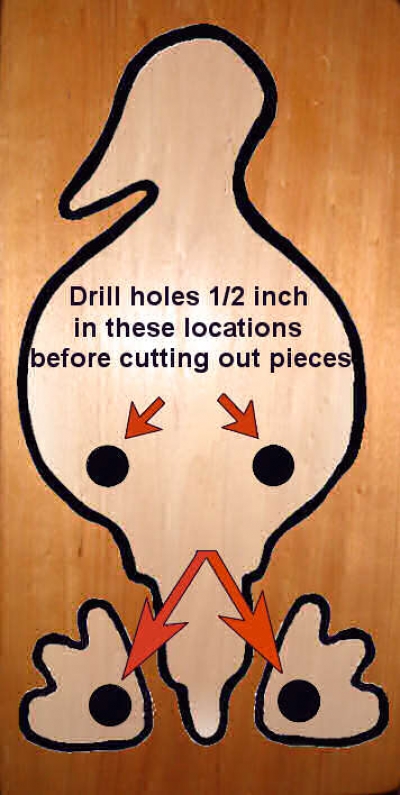
(images by author, sketch representative of desired pattern)
Make the feet round and generous close to the heels because we will be drilling a hole for the legs there. You will want good solid support around the drilled holes. You want the drilled hole to be no closer than 3/4 to perhaps 1/2 inch from the edge of the heel, for strength. The drilled hole can go all the way through the feet and the body respectively so long as the inserted dowel rods are sanded smooth after assembly when the glue has dried.
Drill the 1/2" Diameter Holes for the Dowel Rods At This Time

(sketch by author)
In this step and depiction we will only drill partially through both the body and the feet sections. You may find it advantageous to pre-drill your holes before cutting-out the three pieces from the main board. Although in the past I have cut out the three major pieces first and then drilled the holes for the legs, you may find it best to drill the pieces before cutting them out. it is easier to do and safer with less margin for accidents or error.
If you intend to leave the wood natural and varnish with a light wood stain you will probably wish the dowel ends to not be visible on the bottoms of the feet. Drill only part way through the feet as indicated in the image above. This also saves time by not having to sand the bottoms of the feet to make the visible wooden dowel smooth with the soles of the feet.
Do any carving of details and all sanding of the edges of the body and feet before assembly. A sanded and gentle slope on the edges of the body can suggest a more 3-D effect. The beak and eyes of the bird can be wood-carved as I have done in this example and the edges detail-sanded smooth. Or if you prefer, the beak and eyes can be merely painted instead. The decision is entirely yours.
Next, drill and countersink one or two 1/8th-inch diameter holes near the upper-body and tail section for attaching to the wall, as shown in the first image at the top of page. Two holes are probably best if this is intended to be used as either a towel rack or curtain sash holder to prevent the weight of the pieces from moving or rotating the object when attached to the wall.
Assemble the Feet and Spray Paint Everything
Place a little wood glue or other adhesive into the holes of the feet and insert the dowel rods fully.
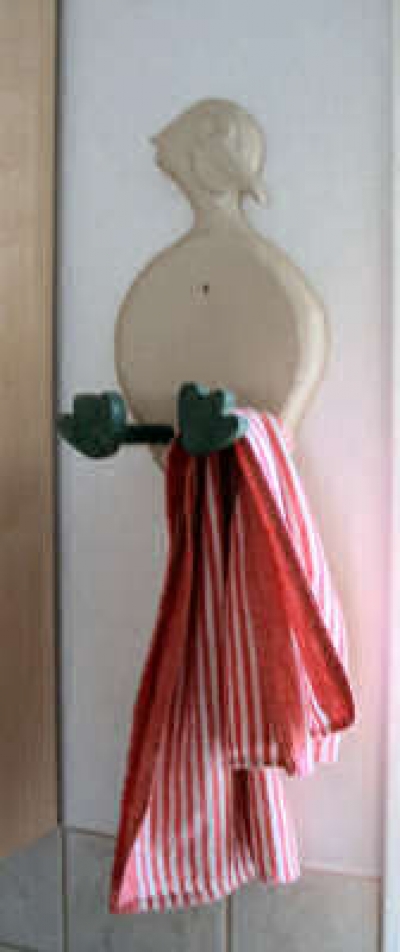
(image by author)
Here we see one of these kitchen dish towel holders in action.
Allow to dry, then do any detail sanding required, and spray paint these in the selected color for the legs and feet. Spray paint the body in its chosen color as well. Allow paint on all pieces to thoroughly dry before final component assembly.
When all painted pieces are completely cured, place a little glue into the leg holes of the body and insert the legs into the body. Position each leg so that the toes of each foot are angled upward and pointing slightly outward away from the body — approximately 15-to-30 degrees tilted outwards looks pleasing but in any case, both feet should be positioned in the same relative outward angle.
Wipe away any glue that may have oozed out of the holes and onto the painted body. Allow the leg-feet inserts to dry in place, and the project is now completed.